![Sabanto-Horizontal-Orange-on-Transparent-RGB-1080px-05.16.23.png]](https://support.sabantoag.com/hs-fs/hubfs/Sabanto-Horizontal-Orange-on-Transparent-RGB-1080px-05.16.23.png?height=50&name=Sabanto-Horizontal-Orange-on-Transparent-RGB-1080px-05.16.23.png)
Record & Playback lets you drive your vehicle along a path and save it as reusable geometry. Those saved recordings can then be used as guidance paths for future autonomous missions, essentially "teaching" the system a route once, then letting it repeat it.
Record & playback is currently an experimental feature undergoing active development. We have released it early to gather feedback, but please be aware that it requires a bit of "finesse" and manual adjustment to run smoothly. Successful execution will require specific workarounds as we continue to refine the experience.
To provide feedback, please submit an issue.
Create or Find the Field
- Create the Field: If this is a new field that doesn't exist, create the field record and define the client, farm and field names.
- Record the field boundary: Using your vehicle, navigate the perimeter of the field. When using the record and playback approach to mission planning, you will be converting your field boundary into a geofence in a later step.
- Change the Field Boundary into a Geofence: In order to define the safe area to navigate and the working area of the field, you will want to change the Field Boundary's type into a Geofence.
Note: Eventually, operators will have the ability to initiate a geofence recording directly instead of converting a field boundary into a geofence as an additional step.
Record a Transit Path
- Start at the Origin Field: Within vMC, navigate to the field where the transit will begin and click the ‘New’ button.
- Use the intended vehicle and implement: It is important to use the same vehicle and implement while recording the path that you intend to be performing the playback mission. If you do not use the same vehicle and implement, it will likely lead to problems during mission planning.
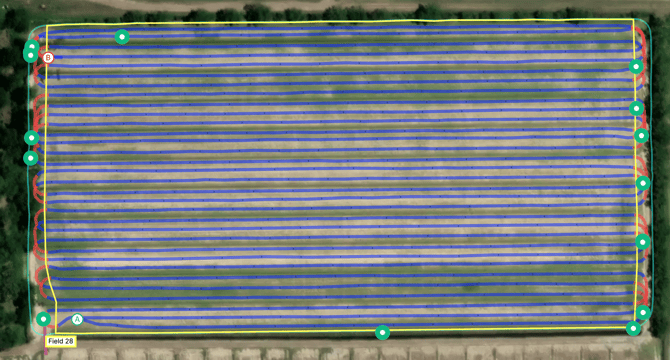
- Initiate Transit Recording: Select ‘Record a transit’ and drive the vehicle to the starting location before recording. Click ‘Begin recording’ once you have reached the starting point. The starting location will marked on the map by an ‘A’ marker.
- End the Recording: While recording, drive the vehicle to the intended end point and click ‘Finish’. The ‘B’ marker will appear on the map to indicate where the recording has ended.
- Verify the Recorded Path: The transit path will now appear on the map when viewing your fields within vMC.
- Convert Type from Transit to Recording: Navigate back to the field and click on the "Geometry" tab. Find the recently created transit geometry on the map, click on it and select "Edit Geometry" from the popover. Under type, change the select menu to "Recording" and press "Save".
- Create Point of Interest at Start: Select the recording from the panel, or on the map and press "Create Start POI" to automatically create a point of interest with a heading defined in the direction of the recording. This will come in handy when lining up the vehicle to the recording.
Note: Eventually, operators will have the ability to initiate a recording directly instead of converting a transit into a recording as an additional step.
Draw the Field Boundary
- Select Polygon Drawing Tool: With your Geofence and Recording geometry defined, navigate to the "Geometry" tab while viewing the field. Press "Add Geometry", then select "Polygon" as your drawing tool.
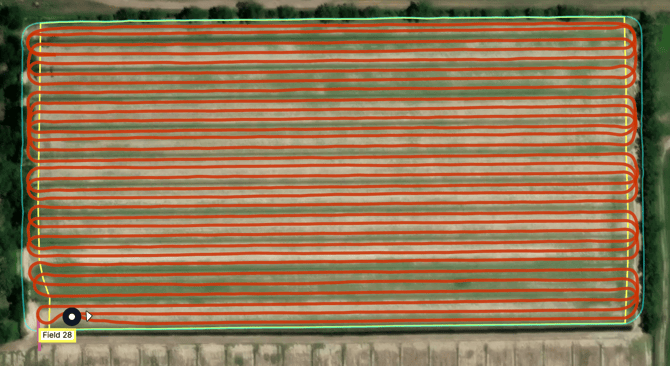
- Draw the Field Boundary: Referencing your Geofence and the Recording, draw the polygon in a way that excludes the end-of-row-turns and stays within the Geofence.
Create a Coverage Plan Template
- Select the equipment configuration: Ensure that the vehicle and implement attached at the time of recording is selected as the coverage plan's configuration.
- Toggle ON the recording: Scroll down to the "Recordings" section of the coverage planner panel and enable the recording you wish to use. This will automatically change the field boundary's configuration to 0 headlands with a 0 meter turn around area in order to ensure the coverage will generate properly with the recording.
- Generate the coverage plan: Press "Generate" and visually inspect the coverage plan's passes to ensure that no passes are missing or distorted. This coverage plan will be used to track the completion progress of your recording mission.
- Save the template: When you are satisfied with the generated coverage plan, press "Save" and proceed to creating a mission with the newly saved template. Now that you have saved this as a template, you will be able to re-run this recording repeatedly throughout the season.
Note: If you identify issues with a generated coverage plan that's using a recording, please contact support for assistance. 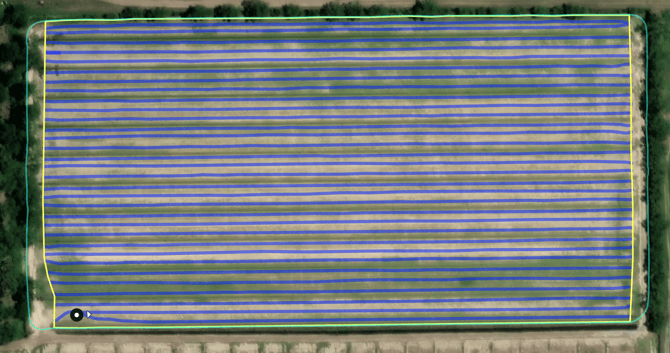
Perform your Record & Playback Mission
- Select your template: To perform a mission using the new template you have created. You can access the template by pressing the "Templates" button when viewing your field and selecting your recording template.
- Generate your mission: When using a coverage plan that was generated from a recording, you should see that the recording is automatically carried through to the mission planner.
- Send to the vehicle: If the vehicle is directly at the starting point of the recording, you can assign the mission directly to the vehicle. Otherwise, if the vehicle is not already at the starting point of the recording, we recommend you add the mission to the queue. After adding the mission to the queue, you can press on the recording's starting point of interest and then press "Send Vehicle Here" to get the vehicle lined up with the recording. Once the vehicle is in position, you can simply press "Next Mission" to load in the record & playback mission.
Note: You may see turn radius violations that are automatically approved. When attempting to use different equipment than what was used to record the original transit, you may also see geofence violations, which will prevent you from assigning the mission. In this case, we recommend re-recording the path with the same equipment you intend to use.